Overview:
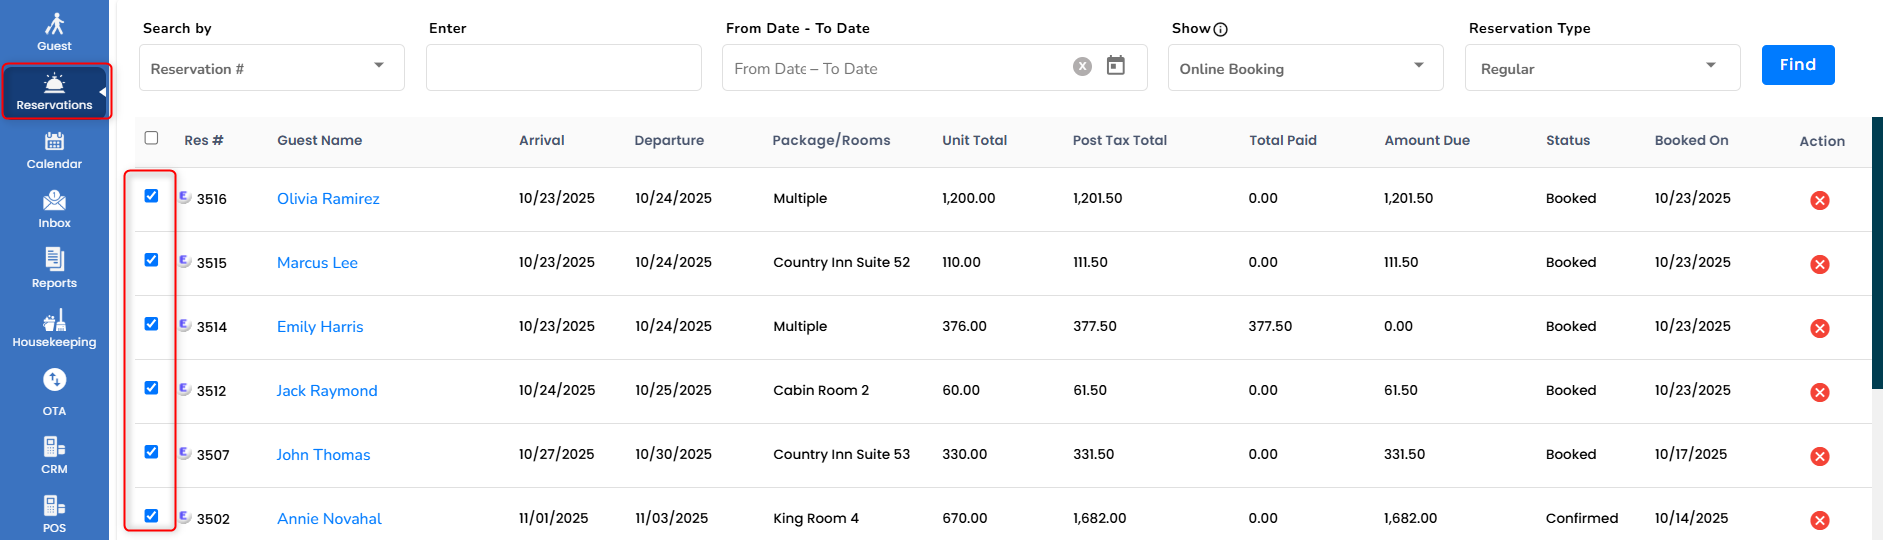
The reservation list screen is used to access the reservations which are in the system. In the list of records, click on the Guest Name to open the reservation screen to perform modification of the reservation.
- Click on the “Reservation” tab, and it displays the reservation screen.

How to search the reservation:
There are four ways to define the reservation list, they are:
- Search by
- Date
- Show
- Reservation Type
1. Search by
- This Search by option contains the drop-down box and it contains a number of filter options:
- Reservation Number, First Name, Last Name, Full Name, City, State, Mobile Number, Address, Guest Type, Agent Name, Group Code, Package Name, and Company Name.
- For Example, If the reservation is to be listed out of the first name of the guest, choose “First Name” from the “Search by” field.
- Enter the name in the “enter” field.
- Then, click the “Find” button. Now the reservation will be listed according to the condition set.

2. Date
- Use the “Date” field, to view the reservation list by Arrival
- Choose the From date and to date and click find.

3. Show
By default, the recent reservations booked during the past 30 days will be displayed.
- Through this option, you can filter the reservations like:
- Today Checked-in, this generates the list of current date check-in reservations.
- Today Checked-out, this generates the list of the respective date checked-out reservations.
- Cancelled, this generates the cancelled reservations list.
- Unconfirmed, this displays the booking made for a guest, who still has not checked in.
- Online Booking, It displays the reservations through online booking like booking.com, Expedia etc.
- Based on the condition, it will generate the reservation list.
- For Example, let us sort the cancelled reservation by choosing “cancelled” under the “Show” field.


Reservation Type:
Under this reservation type, there are four ways to filter the reservation list.
* Regular
* Hourly
* Group
* Package
* All

All:
This is the default display that lists all types of reservations; group, hourly, package, cancelled, checked-in, and checked-out.
Regular:
- This will display nightly room reservations made by Front Office, Easy WebRez, and OTA platforms.
Hourly Reservation:
- This will display the hourly reservations list.
Group Bookings:
- This will generate the group bookings list.
Package:
- It shows the Package reservation list.
Reservation Cancellation:
- Through this reservation list page, you can cancel the reservations.
- Input the respective field using filter options like “Search by,” “Date,” “Reservation Type,” and “Show” in order to retrieve the data which want to cancel the reservation.
- For Example, under the “Search by” field, choose “First Name” and in the “Enter” field, enter the first name of that reservation.
- After the reservation list, go to the right corner of that reservation, under the “Action” field, and click on the “X” mark button.

- Now, a small cancellation reservation window will pop out.
- In this window, there are 2 default fields will be present:
- * Amount – If you charge a cancellation fee, enter the amount before clicking on Cancel Reservation

- Click the “Cancel Reservation,” and click “OK” to confirm the cancellation. Now, on the reservation screen, you can see the status changed to “Cancelled.”

How to Restore a Cancelled Reservation:
- On the reservation list screen, under the “Action” column, there is an “undo” icon. Click on that to restore the cancelled reservation.
- Click on the “OK” button. Now the cancelled reservation restored successfully without affecting the payments and charges made before the cancellation action.

Note:
- To restore the cancelled reservation, the rooms booked under the cancelled reservation should not be reserved for another guest.
- If you try restoring a reservation for the same date and room booked by another guest, you will receive an alert message “Restore Failed! Please check if rooms are already booked on those dates.”

Sorting the Reservation:
- Reservations can be sorted by upper and lower sorting icon.

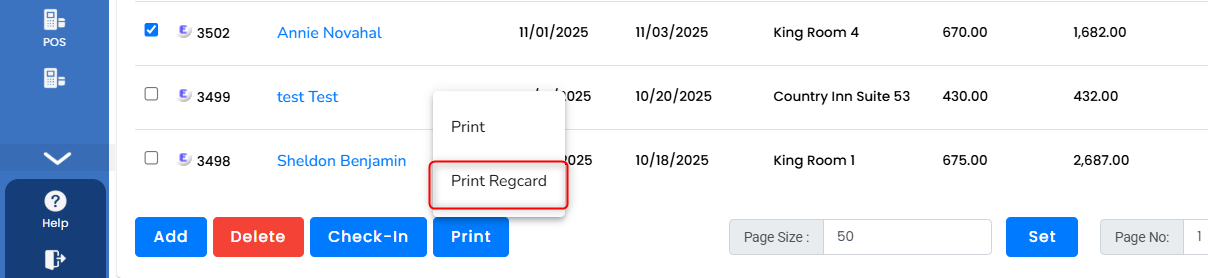
How to add a new reservation from the reservation screen
- On the reservation, scroll down, there is an “Add” button, click on that.

- The reservation window will open.
- Enter the guest details and click on the “Save” button.

- After saving the reservation, it will generate the unique confirmation number for that booking and it can be viewed under the reservation screen, by finding the data.

How to Delete the reservation from the reservation list
- Choose the reservation.
- Click on the checkbox behind the reservation number and press the “Delete” button below.
- Delete confirmation pop-up window will appear and click on “”
- Now the selected reservation will be deleted successfully.
- Note: Deleted reservation cannot be restored, you have to create a new reservation.
How to check in the reservation from the reservation list
- Choose the reservation to check in.
- Click on the “checkbox” behind the reservation number and press the “Check-in” button below. To check-in all reservations on the screen, click ‘checkbox’ next to Res#.
- A check-in confirmation window will pop up and click OK.


- Now, the status of that reservation changed to “Checked-in.”
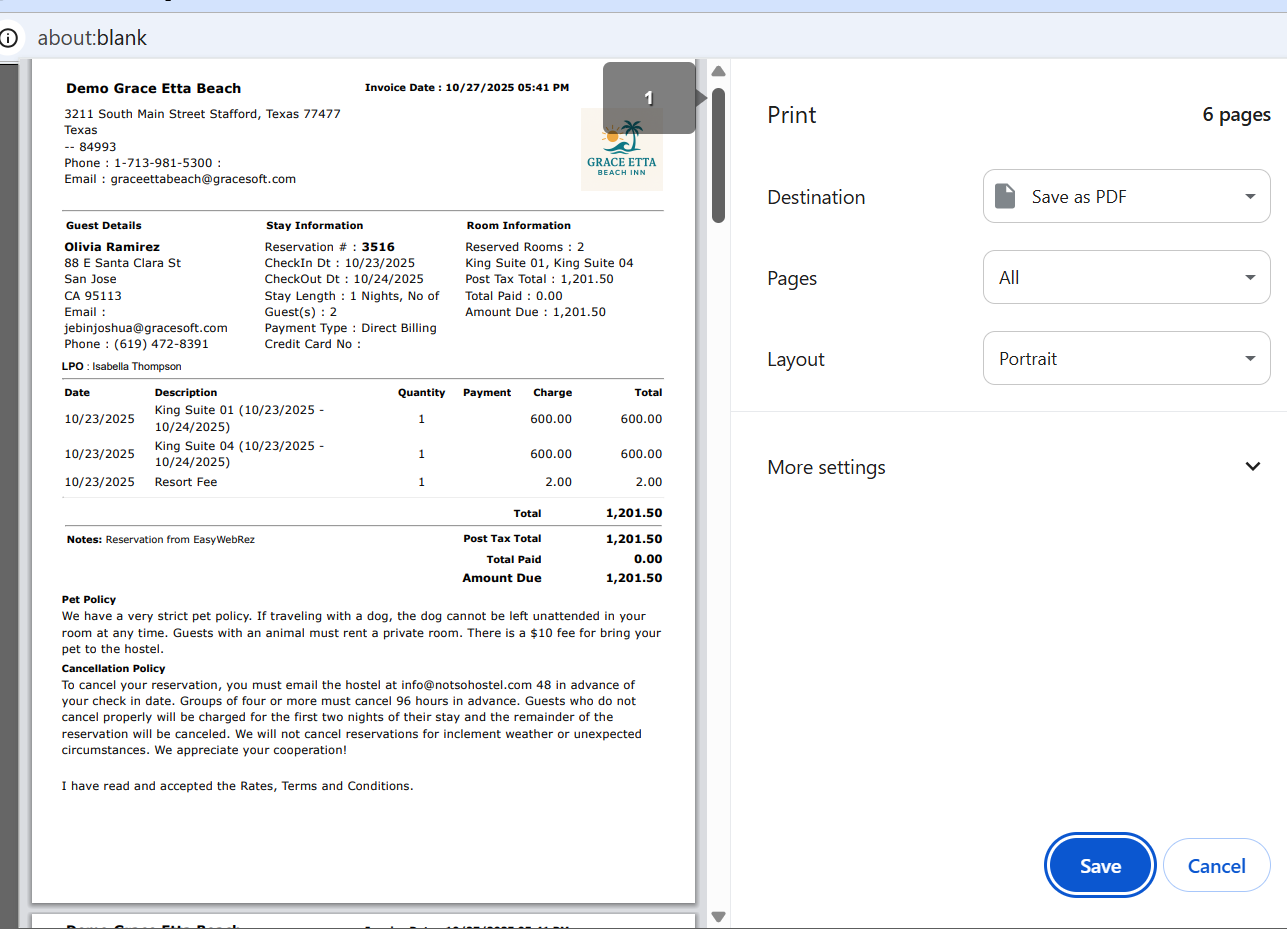
Printing the reservation from the reservation list
- Choose the reservation that you would want to print.
- Click on the checkbox behind the reservation number and press the “Print” button below. To print all reservations on the screen, click ‘checkbox’ next to Res#.
- Now, a print pop-up window will appear, click the “print” button.